Fine Picking - Mobile App
Note
The process of fine picking in the mobile app is very similar to that in the web app. It is therefore advisable to read the process description in the web app first.
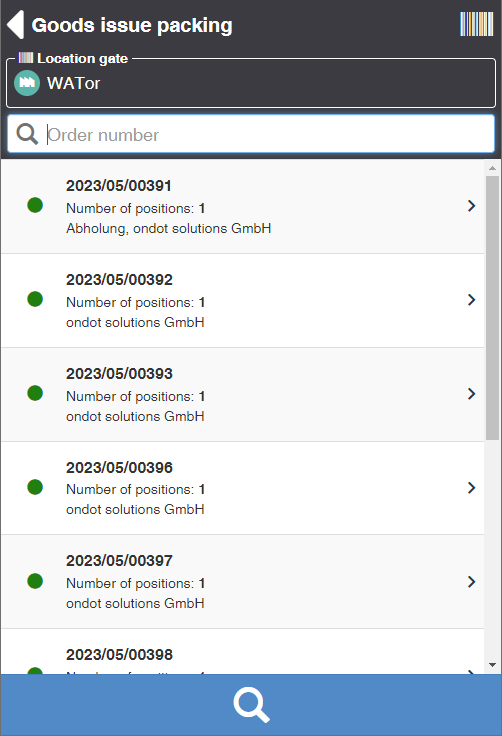
Order - select
In the Warehouse module, click on the menu Fine Picking.
Scan the outgoing goods gate or the storage location of the packing line. This is the target storage location of the pick list.
You will now see the list of all orders whose goods have been placed in this destination storage location and which can be packed.
Select an order.
Fine Picking - Packaging
You can see the list of order items and the quantities to be packed. Items that are already fully packed are marked with a green tick on the right.
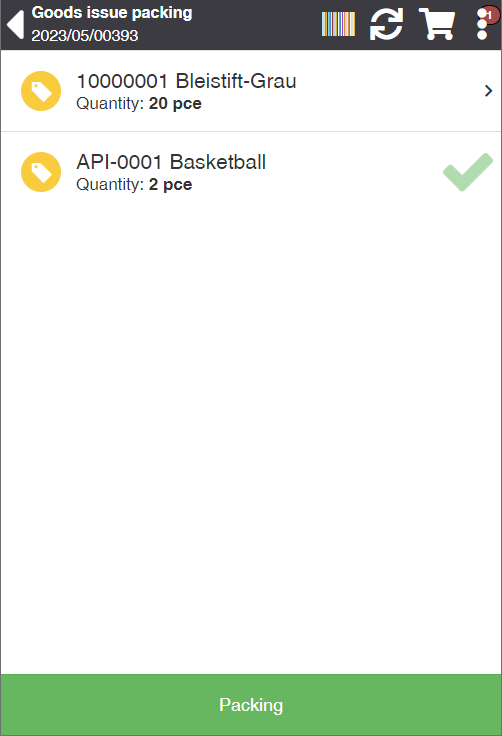
Scan the item number of the goods.
If the item requires the entry of batch numbers, best-before date, etc., enter this data in the appropriate fields. Often, this data is contained in the GS1 barcode and is therefore automatically transferred to the respective fields during scanning.
Enter the quantity you want to pack.
Repeat the process until either all the items of the order have been packed or the collo is full.
Click on the Packing action to complete the packing process for the current collo. See also Completing Collo.
Actions in the title bar
| Symbol | Function * | more information |
|---|---|---|
| reprint labels | Opens a dialog for reprinting item labels. | |
| Article Overview | Displays the list of items that have already been packaged. | |
| Update | Updates the list |
Complete collo
Click on the Packing action to complete the packing process for the current collo.
You will now see the Complete Collo dialog. Either select an existing collo or leave the collo no. blank to create a new one.
Then enter the loading equipment, as well as the dimensions and weight of the colli to be created.
Click the Save action.
Repeat the process for all subsequent collis.

actions
| Function * | more information |
|---|---|
| Search Article | Enter a search term such as the article number or the name of the article and press the ENTER key. The system will show you suitable articles depending on the context. For example, when goods are transferred, only items from the notification are displayed. |
| Show article info | Switches to the Article Info View for the currently active article. Here you can see the basic information such as designation, system unit, standard loading equipment and weight. From here you can store an article image, edit the master data such as properties and dimensions as well as store other barcodes. |
| Print article label | Prints the item labels for the active item. |
| Print item label with quantity | Prints an item label with additional properties and quantity. Displays a dialog for entering various article properties, if none have been specified yet, otherwise the fields are blocked for entry. In addition, a loading device and a system unit quantity can be specified, which is printed on the (standard) article warehouse label as "Quantity: x". |
* Attention: Depending on the context, not all actions are always available!